Together, We Are Fan-cactus!
- Shanna Truffini

- Apr 10, 2020
- 2 min read
Updated: Apr 23, 2020
Hello Gardeners!
How are you doing out there? In these upside down times it is important to keep checking in on yourself and your kids. Talking with your family and friends about how you are feeling sometimes needs to be done on a day to day, hour to hour basis. We are all in this together and here to help you through these challenging times. We will continue to post fun and easy activities for the whole family to enjoy. Keeping our minds and hands active with a positive craft, recipe or project allows us to enter a “flow” state which is the perfect balance between skill and challenge.
Today, we are going to keep things simple and fun with this Paper Cactus Craft 🌵! This craft is great for younger gardeners looking to develop those #finemotorskills - lots of small scissor cuts and bending of paper.
All you'll need to complete your paper cactus is:
Colored paper (green for sure!)
Scissors
Tape*

*If you need to sub glue for tape that will work but we found it to be a bit messier!
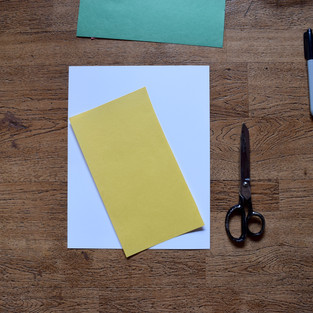
First cut a strip of your yellow paper. This is going to be your "planter" for your cactus. Take the strip and roll it to form a cylinder and tape in place. Then, secure it to your white paper. Next, cut strips (varying widths) of your green paper.
Start to fold your green strips in half, but don't crease the bend. Secure the two loose ends together with a piece of tape and then attach to your paper. Do this with various sizes and lengths so it starts to form a cactus shape.
Next cut out small flower shapes from your red piece of paper. I like to fold the paper a few times so I can cut out multiple at a time! Using very small pieces of tape, attach the flowers to your cactus.
Finally, I wanted to add some decoration to my planter, so I cut out some triangles and taped them all over my cylinder. And there you have it! A beautiful paper cactus sure to add a fresh & fun touch to your refrigerator or walls. We really love the 3D element to this craft - something a little different!


Comments