


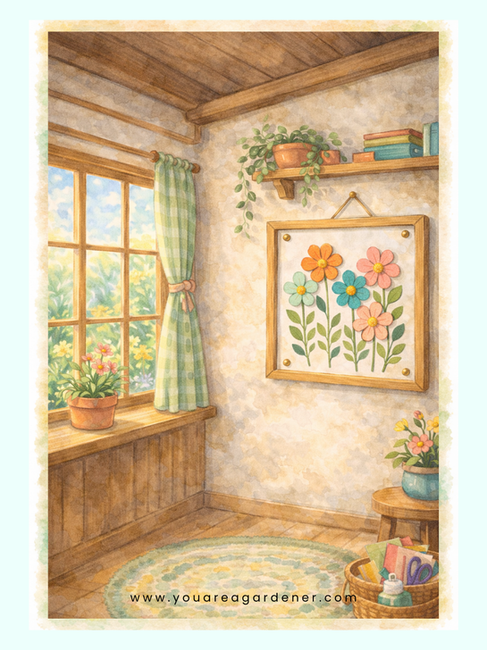
A Spring Craft in Full Bloom: A Framed Paper Flower Garden for Gardeners of All Ages
- Shanna Truffini
- Mar 12
- 5 min read

Spring is a season that reminds us how beautiful growth can be. Buds begin to open, colors return to the garden, and creativity tends to bloom right along with the flowers. One wonderful way to celebrate the season is through a simple and meaningful spring craft for all ages that turns paper into a framed garden scene.
This framed paper flower garden craft is more than just a creative spring craft. It invites gardeners young or grown to slow down, focus on each small step, and enjoy watching something beautiful take shape from simple materials.
Just like tending a garden, crafting often begins with small pieces that gradually come together to create something wonderful.
Scroll down to discover how crafting helps gardeners of all ages grow confidence and calm, follow the step-by-step instructions to build your own framed flower garden, and collect your new Gardening Tool Badge when your creativity blooms.

The Benefits of Crafts for Gardeners of All Ages
Creative activities are powerful gardening tools for emotional growth, focus, and connection. Whether you are crafting alone, with children, or alongside friends or family, hands-on creativity nurtures both the mind and the heart.
Crafting together helps us:
✓ practice patience as we work step by step
✓ strengthen focus and attention
✓ express creativity in colorful ways
✓ relax and calm the mind
✓ build confidence through completing a project
✓ create meaningful memories together
✓ experience the joy of making something from the heart
Just like pulling weeds and planting seeds in the garden, crafting reminds us that beautiful results often grow from small, thoughtful actions.

Why This Spring Craft Is So Fun
This craft is especially enjoyable because it moves from parts to whole, much like watching flowers grow in a garden.
First, we cut individual pieces of paper to begin building our garden.
Next, we shape petals, leaves, and tiny flower centers.
Then we arrange the pieces carefully to design our blooming scene.
Finally, everything comes together into a finished garden that can be framed and enjoyed every day.
The best part is that each person’s garden will look a little different. Some may create tall flowers. Others may design small blossoms or leafy stems. Every finished frame becomes a unique garden of creativity.

A Beautiful Craft That Can Be Displayed Anywhere
Once your paper flower garden is complete, place it in a frame and display it proudly.
This handmade artwork looks wonderful in:
🌸 a bedroom
🌸 a home office
🌸 a classroom
🌸 a craft room
🌸 a family room
🌸 a reading nook
It also makes a thoughtful homemade gift from the heart for teachers, friends, grandparents, or anyone who appreciates creativity and kindness.
Every time someone sees the framed garden, they will be reminded that beautiful things can grow from simple beginnings.

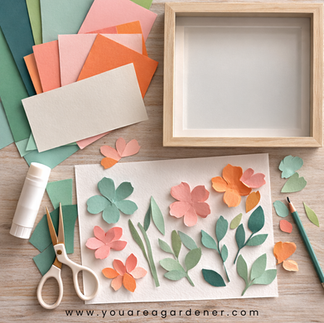
Materials Needed
For the prettiest results, choose matte craft paper or lightweight cardstock rather than regular construction paper. Textured cardstock or scrapbook paper creates softer colors and cleaner shapes.
You will need:
• pastel cardstock or craft paper in mint green, teal, pink, and orange
• green cardstock for stems and leaves
• yellow cardstock for flower centers
• white cardstock or watercolor paper for the background
• scissors
• pencil
• glue stick or craft glue
• a frame or floating frame for display
Optional tools:
• tweezers for placing small pieces
• a toothpick for rolling flower centers
Step-by-Step Instructions


Step 1: Prepare Your Background
Place your white cardstock or watercolor paper on your work surface. This will become the base where your garden grows.
*If you plan to frame the artwork, make sure the paper fits nicely inside your frame.
Step 2: Cut Flower Petals
Using pinks and oranges from your paper palette, cut simple flower shapes.
Each flower can have five or six rounded petals. You can draw the shape lightly with a pencil first, or simply cut freehand.
*Remember that gardens are full of variety, so your flowers do not have to be identical.
Step 3: Cut Stems and Leaves
From green cardstock, cut long thin strips for stems.
Next, cut small leaf shapes.
*Try making leaves in different sizes so your garden looks natural and full.
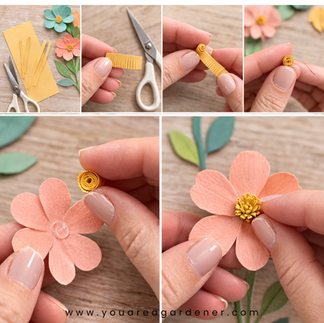
Step 4: Create the Yellow Flower Centers
-Cut a strip of yellow cardstock about:½ inch tall2 to 3 inches long
-Using scissors, cut tiny fringe along one long edge of the strip.
-Be sure to leave a small uncut edge at the bottom so the strip stays together.
-Roll the strip tightly from one end, keeping the fringe at the top.
-Add a tiny dot of glue to secure the end.
-Then gently open the fringe with your fingers so the center spreads outward like a tiny burst of petals.
Step 5: Assemble the Flowers
Place a small dot of glue in the center of each flower and attach the yellow center.
Press gently and allow the glue to dry.
Step 6: Arrange Your Garden
Now comes the fun part.
Arrange the stems, leaves, and flowers on your background paper.
Move the pieces around until the layout feels balanced and lively, just like a garden in bloom.
Once you are happy with the arrangement, glue each piece into place.
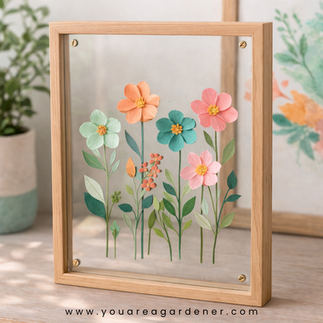
Step 7: Frame Your Garden
Allow everything to dry completely. Place your artwork into a frame and display your finished spring garden proudly. Every time you see it, you will remember that creativity can bloom anywhere.


Let Your Garden Grow
This simple spring paper flower craft reminds us that creativity often grows one step at a time. Small pieces, thoughtful effort, and a little imagination can come together to create something truly beautiful.
Just like in the garden, when we give ourselves time to create, our ideas begin to bloom.
So gather your materials, invite gardeners young or grown to join you, and let this spring craft fill your space with color, creativity, and connection.

🌟 Collect Your Gardening Tool Badge: Framed Flower Garden
Creative activities like this help gardeners of all ages practice patience, focus, and joyful expression. That is why crafting is one of the many wonderful gardening tools we can use to grow from the inside out.
After completing this activity, add the Framed Flower Garden Gardening Tool Badge to your collection.
Click the badge below to download it and add it to your Gardening Tool Collector Sheet.
Keep growing gardeners, keep creating, and keep planting seeds of positivity wherever you go!

“Just like a garden, the most beautiful creations begin with simple pieces and a little patience.”
You are a gardener.


Comments